Fine-tuning a BERT model for search applications

How to ensure training and serving encoding compatibility

There are cases where the inputs to your Transformer model are pairs of sentences, but you want to process each sentence of the pair at different times due to your application’s nature. Search applications are one example.
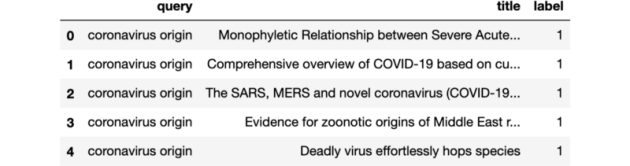
Photo by Alice Dietrich on Unsplash

The search use case

Search applications involve a large collection of documents that can be pre-processed and stored before a search action is required. On the other hand, a query triggers a search action, and we can only process it in real-time. Search apps’ goal is to return the most relevant documents to the query as quickly as possible. By applying the tokenizer to the documents as soon as we feed them to the application, we only need to tokenize the query when a search action is required, saving us precious time.

In addition to applying the tokenizer at different times, you also want to retain adequate control about encoding your pair of sentences. For search, you might want to have a joint input vector of length 128 where the query, which is usually smaller than the document, contributes with 32 tokens while the document can take up to 96 tokens.

Training and serving compatibility

When training a Transformer model for search, you want to ensure that the training data will follow the same pattern used by the search engine serving the final model. I have written a blog post on how to get started with BERT model fine-tuning using the transformer library. This piece will adapt the training routine with a custom encoding based on two separate tokenizers to reproduce how a Vespa application would serve the model once deployed.

Create independent BERT encodings

The only change required is simple but essential. In my previous post, we discussed the vanilla case where we applied the tokenizer directly to the pairs of queries and documents.

from transformers import BertTokenizerFast

model_name = "google/bert_uncased_L-4_H-512_A-8"
tokenizer = BertTokenizerFast.from_pretrained(model_name)

train_encodings = tokenizer(
    train_queries, train_docs, truncation=True, 
    padding='max_length', max_length=128
)
val_encodings = tokenizer(
    val_queries, val_docs, truncation=True, 
    padding='max_length', max_length=128
)

In the search case, we create the create_bert_encodings function that will apply two different tokenizers, one for the query and the other for the document. In addition to allowing for different query and document max_length, we also need to set add_special_tokens=False and not use padding as those need to be included by our custom code when joining the tokens generated by the tokenizer.

def create_bert_encodings(
    queries, docs, tokenizer, query_input_size, doc_input_size
):
    queries_encodings = tokenizer(
        queries, truncation=True, 
        max_length=query_input_size-2, add_special_tokens=False
    )
    docs_encodings = tokenizer(
        docs, truncation=True, 
        max_length=doc_input_size-1, add_special_tokens=False
    )

    TOKEN_NONE=0
    TOKEN_CLS=101
    TOKEN_SEP=102

    input_ids = []
    token_type_ids = []
    attention_mask = []
    for query_input_ids, doc_input_ids in zip(
        queries_encodings["input_ids"], docs_encodings["input_ids"]
    ):
        # create input id
        input_id = [TOKEN_CLS] + query_input_ids + [TOKEN_SEP] + 
            doc_input_ids + [TOKEN_SEP]
        number_tokens = len(input_id)
        padding_length = max(128 - number_tokens, 0)
        input_id = input_id + [TOKEN_NONE] * padding_length
        input_ids.append(input_id)
        # create token id
        token_type_id = [0] * 
            len([TOKEN_CLS] + query_input_ids + [TOKEN_SEP]) + 
            [1] * len(doc_input_ids + [TOKEN_SEP]) + 
            [TOKEN_NONE] * padding_length
        token_type_ids.append(token_type_id)
        # create attention_mask
        attention_mask.append(
            [1] * number_tokens + [TOKEN_NONE] * padding_length
        )

    encodings = {
        "input_ids": input_ids,
        "token_type_ids": token_type_ids,
        "attention_mask": attention_mask
    }
    return encodings

We then create the train_encodings and val_encodings required by the training routine. Everything else on the training routine works just the same.

from transformers import BertTokenizerFast

model_name = "google/bert_uncased_L-4_H-512_A-8"
tokenizer = BertTokenizerFast.from_pretrained(model_name)

train_encodings = create_bert_encodings(
    queries=train_queries, 
    docs=train_docs, 
    tokenizer=tokenizer, 
    query_input_size=32, 
    doc_input_size=96
)

val_encodings = create_bert_encodings(
    queries=val_queries, 
    docs=val_docs, 
    tokenizer=tokenizer, 
    query_input_size=32, 
    doc_input_size=96
)

Conclusion and future work

Training a model to deploy in a search application require us to ensure that the training encodings are compatible with encodings used at serving time. We generate document encodings offline when feeding the documents to the search engine while creating query encoding at run-time upon arrival of the query. It is often relevant to use different maximum lengths for queries and documents, and other possible configurations.

Photo by Steve Johnson on Unsplash

We showed how to customize BERT model encodings to ensure this training and serving compatibility. However, a better approach is to build tools that bridge the gap between training and serving by allowing users to request training data that respects by default the encodings used when serving the model. pyvespa will include such integration to make it easier for Vespa users to train BERT models without having to adjust the encoding generation manually as we did above.

Fine-tuning a BERT model with transformers

Setup a custom Dataset, fine-tune BERT with Transformers Trainer, and export the model via ONNX

This post describes a simple way to get started with fine-tuning transformer models. It will cover the basics and introduce you to the amazing Trainer class from the transformers library. You can run the code from Google Colab but do not forget to enable GPU support.

Photo by Samule Sun on Unsplash

We use a dataset built from COVID-19 Open Research Dataset Challenge. This work is one small piece of a larger project that is to build the cord19 search app.

Install required libraries

!pip install pandas transformers

Load the dataset

To fine-tune the BERT models for the cord19 application, we need to generate a set of query-document features and labels that indicate which documents are relevant for the specific queries. For this exercise, we will use the query string to represent the query and the title string to represent the documents.

training_data = read_csv("https://thigm85.github.io/data/cord19/cord19-query-title-label.csv")
training_data.head()
png

There are 50 unique queries.

len(training_data["query"].unique())
50

For each query, we have a list of documents, divided between relevant (label=1) and irrelevant (label=0).

training_data[["title", "label"]].groupby("label").count()
png

Data split

We are going to use a simple data split into train and validation sets for illustration purposes. Even though we have more than 50 thousand data points when considering unique query and document pairs, I believe this specific case would benefit from cross-validation since it has only 50 queries containing relevance judgment.

from sklearn.model_selection import train_test_split
train_queries, val_queries, train_docs, val_docs, train_labels, val_labels = train_test_split(
    training_data["query"].tolist(), 
    training_data["title"].tolist(), 
    training_data["label"].tolist(), 
    test_size=.2
)

Create BERT encodings

Create a train and validation encodings. To do that, we need to chose which BERT model to use. We will use padding and truncation because the training routine expects all tensors within a batch to have the same dimensions.

from transformers import BertTokenizerFast

model_name = "google/bert_uncased_L-4_H-512_A-8"
tokenizer = BertTokenizerFast.from_pretrained(model_name)

train_encodings = tokenizer(train_queries, train_docs, truncation=True, padding='max_length', max_length=128)
val_encodings = tokenizer(val_queries, val_docs, truncation=True, padding='max_length', max_length=128)

Create a custom dataset

Now that we have the encodings and the labels, we can create a Dataset object as described in the transformers webpage about custom datasets.

import torch

class Cord19Dataset(torch.utils.data.Dataset):
    def __init__(self, encodings, labels):
        self.encodings = encodings
        self.labels = labels

    def __getitem__(self, idx):
        item = {key: torch.tensor(val[idx]) for key, val in self.encodings.items()}
        item['labels'] = torch.tensor(self.labels[idx])
        return item

    def __len__(self):
        return len(self.labels)

train_dataset = Cord19Dataset(train_encodings, train_labels)
val_dataset = Cord19Dataset(val_encodings, val_labels)

Fine-tune the BERT model

We are going to use BertForSequenceClassification, since we are trying to classify query and document pairs into two distinct classes (non-relevant, relevant).

from transformers import BertForSequenceClassification

model = BertForSequenceClassification.from_pretrained(model_name)

We can set requires_grad to False for all the base model parameters to fine-tune only the task-specific parameters.

for param in model.base_model.parameters():
    param.requires_grad = False

We can then fine-tune the model with Trainer. Below is a basic routine with an out-of-the-box set of parameters. Care should be taken when choosing the parameters below, but this is out of this piece’s scope.

from transformers import Trainer, TrainingArguments

training_args = TrainingArguments(
    output_dir='./results',          # output directory
    evaluation_strategy="epoch",     # Evaluation is done at the end of each epoch.
    num_train_epochs=3,              # total number of training epochs
    per_device_train_batch_size=16,  # batch size per device during training
    per_device_eval_batch_size=64,   # batch size for evaluation
    warmup_steps=500,                # number of warmup steps for learning rate scheduler
    weight_decay=0.01,               # strength of weight decay
    save_total_limit=1,              # limit the total amount of checkpoints. Deletes the older checkpoints.    
)


trainer = Trainer(
    model=model,                         # the instantiated 🤗 Transformers model to be trained
    args=training_args,                  # training arguments, defined above
    train_dataset=train_dataset,         # training dataset
    eval_dataset=val_dataset             # evaluation dataset
)

trainer.train()

Export the model to ONNX

Once training is complete, we can export the model using the ONNX format to be deployed elsewhere. I assume below that you have access to a GPU, which you can get from Google Colab, for example.

from torch.onnx import export

device = torch.device("cuda") 

model_onnx_path = "model.onnx"
dummy_input = (
    train_dataset[0]["input_ids"].unsqueeze(0).to(device), 
    train_dataset[0]["token_type_ids"].unsqueeze(0).to(device), 
    train_dataset[0]["attention_mask"].unsqueeze(0).to(device)
)
input_names = ["input_ids", "token_type_ids", "attention_mask"]
output_names = ["logits"]
export(
    model, dummy_input, model_onnx_path, input_names = input_names, 
    output_names = output_names, verbose=False, opset_version=11
)

Concluding remarks

As mentioned before, this post covered basic training setup. This is a good starting point to be improved upon. It is better to start simple and complement than the opposite, especially when learning something new. I left important topics such as hyperparameter tuning, cross-validation, and more detailed model validation to followup posts. But having a basic training setup is a good first step.

How to evaluate Vespa ranking functions from python

Using pyvespa to evaluate cord19 search application ranking functions currently in production.

This is the second on a series of blog posts that will show you how to improve a text search application, from downloading data to fine-tuning BERT models.

The previous post showed how to download and parse TREC-COVID data. This one will focus on evaluating two query models available in the cord19 search application. Those models will serve as baselines for future improvements.

You can also run the steps contained here from Google Colab.

Photo by Agence Olloweb on Unsplash

Download processed data

We can start by downloading the data that we have processed before.

import requests, json
from pandas import read_csv

topics = json.loads(requests.get(
  "https://thigm85.github.io/data/cord19/topics.json").text
)
relevance_data = read_csv(
  "https://thigm85.github.io/data/cord19/relevance_data.csv"
)

topics contain data about the 50 topics available, including query, question and narrative.

topics["1"]
{'query': 'coronavirus origin',
 'question': 'what is the origin of COVID-19',
 'narrative': "seeking range of information about the SARS-CoV-2 virus's origin, including its evolution, animal source, and first transmission into humans"}

relevance_data contains the relevance judgments for each of the 50 topics.

relevance_data.head(5)
png

Install pyvespa

We are going to use pyvespa to evaluate ranking functions from python.

!pip install pyvespa

pyvespa provides a python API to Vespa. It allows us to create, modify, deploy, and interact with running Vespa instances. The library’s main goal is to allow for faster prototyping and facilitate Machine Learning experiments for Vespa applications.

Format the labeled data into expected pyvespa format

pyvespa expects labeled data to follow the format illustrated below. It is a list of dict where each dict represents a query containing query_id, query and a list of relevant_docs. Each relevant document contains a required id key and an optional score key.

labeled_data = [
    {
        'query_id': 1,
        'query': 'coronavirus origin',
        'relevant_docs': [{'id': '005b2j4b', 'score': 2}, {'id': '00fmeepz', 'score': 1}]
    },
    {
        'query_id': 2,
        'query': 'coronavirus response to weather changes',
        'relevant_docs': [{'id': '01goni72', 'score': 2}, {'id': '03h85lvy', 'score': 2}]
    }
]

We can create labeled_data from the topics and relevance_data that we downloaded before. We are only going to include documents with relevance score > 0 into the final list.

labeled_data = [
    {
        "query_id": int(topic_id), 
        "query": topics[topic_id]["query"], 
        "relevant_docs": [
            {
                "id": row["cord_uid"], 
                "score": row["relevancy"]
            } for idx, row in relevance_data[relevance_data.topic_id == int(topic_id)].iterrows() if row["relevancy"] > 0
        ]
    } for topic_id in topics.keys()]

Define query models to be evaluated

We are going to define two query models to be evaluated here. Both will match all the documents that share at least one term with the query. This is defined by setting match_phase = OR().

The difference between the query models happens in the ranking phase. The or_default model will rank documents based on nativeRank, while the or_bm25 model will rank documents based on BM25. Discussion about those two types of ranking is out of the scope of this tutorial. It is enough to know that they rank documents according to two different formulas.

Those ranking profiles were defined by the team behind the cord19 app and can be found here.

from vespa.query import Query, RankProfile, OR

query_models = {
    "or_default": Query(
        match_phase = OR(),
        rank_profile = RankProfile(name="default")
    ),
    "or_bm25": Query(
        match_phase = OR(),
        rank_profile = RankProfile(name="bm25t5")
    )
}

Define metrics to be used in the evaluation

We want to compute the following metrics:

  • The percentage of documents matched by the query
  • Recall @ 10
  • Reciprocal rank @ 10
  • NDCG @ 10
from vespa.evaluation import MatchRatio, Recall, ReciprocalRank, NormalizedDiscountedCumulativeGain

eval_metrics = [
    MatchRatio(), 
    Recall(at=10), 
    ReciprocalRank(at=10), 
    NormalizedDiscountedCumulativeGain(at=10)
]

Evaluate

Connect to a running Vespa instance:

from vespa.application import Vespa

app = Vespa(url = "https://api.cord19.vespa.ai")

Compute the metrics defined above for each query model and store the results in a dictionary.

evaluations = {}
for query_model in query_models:
    evaluations[query_model] = app.evaluate(
        labeled_data = labeled_data,
        eval_metrics = eval_metrics,
        query_model = query_models[query_model],
        id_field = "cord_uid",
        hits = 10
    )

Analyze results

Let’s first combine the data into one DataFrame in a format to facilitate a comparison between query models.

import pandas as pd

metric_values = []
for query_model in query_models:
    for metric in eval_metrics:
        metric_values.append(
            pd.DataFrame(
                data={
                    "query_model": query_model, 
                    "metric": metric.name, 
                    "value": evaluations[query_model][metric.name + "_value"].to_list()
                }
            )
        )
metric_values = pd.concat(metric_values, ignore_index=True)
metric_values.head()
png

We can see below that the query model based on BM25 is superior across all metrics considered here.

metric_values.groupby(['query_model', 'metric']).mean()
png

We can also visualize the metrics’ distribution across the queries to get a better picture of the results.

import plotly.express as px

fig = px.box(
    metric_values[metric_values.metric == "ndcg_10"], 
    x="query_model", 
    y="value", 
    title="Ndgc @ 10",
    points="all"
)
fig.show()