Setup a custom Dataset, fine-tune BERT with Transformers Trainer, and export the model via ONNX
This post describes a simple way to get started with fine-tuning transformer models. It will cover the basics and introduce you to the amazing Trainer class from the transformers library. You can run the code from Google Colab but do not forget to enable GPU support.

We use a dataset built from COVID-19 Open Research Dataset Challenge. This work is one small piece of a larger project that is to build the cord19 search app.
Install required libraries
!pip install pandas transformersLoad the dataset
To fine-tune the BERT models for the cord19 application, we need to generate a set of query-document features and labels that indicate which documents are relevant for the specific queries. For this exercise, we will use the query string to represent the query and the title string to represent the documents.
training_data = read_csv("https://thigm85.github.io/data/cord19/cord19-query-title-label.csv")
training_data.head()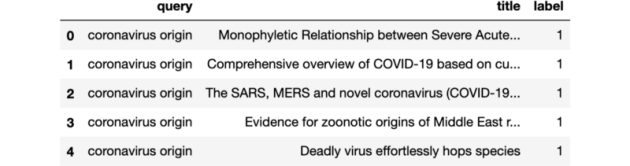
There are 50 unique queries.
len(training_data["query"].unique())50For each query, we have a list of documents, divided between relevant (label=1) and irrelevant (label=0).
training_data[["title", "label"]].groupby("label").count()
Data split
We are going to use a simple data split into train and validation sets for illustration purposes. Even though we have more than 50 thousand data points when considering unique query and document pairs, I believe this specific case would benefit from cross-validation since it has only 50 queries containing relevance judgment.
from sklearn.model_selection import train_test_split
train_queries, val_queries, train_docs, val_docs, train_labels, val_labels = train_test_split(
    training_data["query"].tolist(),
    training_data["title"].tolist(),
    training_data["label"].tolist(),
    test_size=.2
)
Create BERT encodings
Create a train and validation encodings. To do that, we need to chose which BERT model to use. We will use padding and truncation because the training routine expects all tensors within a batch to have the same dimensions.
from transformers import BertTokenizerFast

model_name = "google/bert_uncased_L-4_H-512_A-8"
tokenizer = BertTokenizerFast.from_pretrained(model_name)

train_encodings = tokenizer(train_queries, train_docs, truncation=True, padding='max_length', max_length=128)
val_encodings = tokenizer(val_queries, val_docs, truncation=True, padding='max_length', max_length=128)
Create a custom dataset
Now that we have the encodings and the labels, we can create a Dataset object as described in the transformers webpage about custom datasets.
import torch

class Cord19Dataset(torch.utils.data.Dataset):
    def __init__(self, encodings, labels):
        self.encodings = encodings
        self.labels = labels

    def __getitem__(self, idx):
        item = {key: torch.tensor(val[idx]) for key, val in self.encodings.items()}
        item['labels'] = torch.tensor(self.labels[idx])
        return item

    def __len__(self):
        return len(self.labels)

train_dataset = Cord19Dataset(train_encodings, train_labels)
val_dataset = Cord19Dataset(val_encodings, val_labels)
Fine-tune the BERT model
We are going to use BertForSequenceClassification, since we are trying to classify query and document pairs into two distinct classes (non-relevant, relevant).
from transformers import BertForSequenceClassification

model = BertForSequenceClassification.from_pretrained(model_name)
We can set requires_grad to False for all the base model parameters to fine-tune only the task-specific parameters.
for param in model.base_model.parameters():
    param.requires_grad = False
We can then fine-tune the model with Trainer. Below is a basic routine with an out-of-the-box set of parameters. Care should be taken when choosing the parameters below, but this is out of this piece’s scope.
from transformers import Trainer, TrainingArguments

training_args = TrainingArguments(
    output_dir='./results',          # output directory
    evaluation_strategy="epoch",     # Evaluation is done at the end of each epoch.
    num_train_epochs=3,              # total number of training epochs
    per_device_train_batch_size=16,  # batch size per device during training
    per_device_eval_batch_size=64,   # batch size for evaluation
    warmup_steps=500,                # number of warmup steps for learning rate scheduler
    weight_decay=0.01,               # strength of weight decay
    save_total_limit=1,              # limit the total amount of checkpoints. Deletes the older checkpoints.
)


trainer = Trainer(
    model=model,                         # the instantiated 🤗 Transformers model to be trained
    args=training_args,                  # training arguments, defined above
    train_dataset=train_dataset,         # training dataset
    eval_dataset=val_dataset             # evaluation dataset
)

trainer.train()
Export the model to ONNX
Once training is complete, we can export the model using the ONNX format to be deployed elsewhere. I assume below that you have access to a GPU, which you can get from Google Colab, for example.
from torch.onnx import export

device = torch.device("cuda")

model_onnx_path = "model.onnx"
dummy_input = (
    train_dataset[0]["input_ids"].unsqueeze(0).to(device),
    train_dataset[0]["token_type_ids"].unsqueeze(0).to(device),
    train_dataset[0]["attention_mask"].unsqueeze(0).to(device)
)
input_names = ["input_ids", "token_type_ids", "attention_mask"]
output_names = ["logits"]
export(
    model, dummy_input, model_onnx_path, input_names = input_names,
    output_names = output_names, verbose=False, opset_version=11
)
Concluding remarks
As mentioned before, this post covered basic training setup. This is a good starting point to be improved upon. It is better to start simple and complement than the opposite, especially when learning something new. I left important topics such as hyperparameter tuning, cross-validation, and more detailed model validation to followup posts. But having a basic training setup is a good first step.
